What this guide compares
This research-based guide compares two Clover working hoops and explains when a separate decorative hoop makes more sense. Specifications come from Clover's official product pages. DMC's bamboo hoop page supports the display alternative discussed below. No hands-on tension, fabric-marking or durability tests were performed, and these choices do not represent a ranking of every hoop available. The selection criteria are working diameter, design placement, access to the back of the fabric and the appearance you want after stitching. A larger hoop is useful only when that extra working area suits the project and feels manageable in your hand.
Compare the working sizes
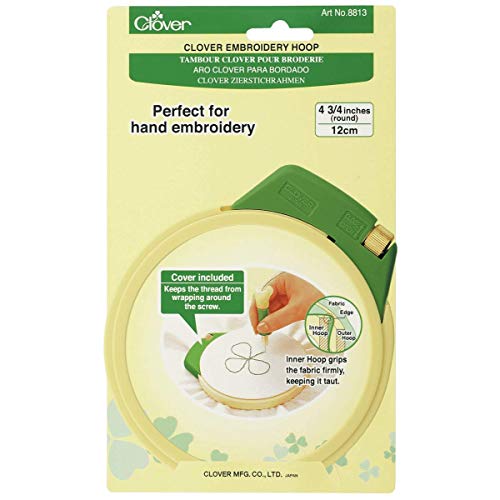
Hoop: Clover Small Embroidery Hoop; Manufacturer-listed diameter: 4-3/4 inches, 12 cm; Suggested use: Small motifs or working on one section at a time; Main tradeoff: More repositioning for a wider design. Hoop: Clover Large Embroidery Hoop; Manufacturer-listed diameter: 7 inches, 18 cm; Suggested use: Working across a larger motif; Main tradeoff: Requires more surrounding fabric and space to hold. Clover lists these as hand-embroidery hoops on its small hoop page and large hoop page. The use-case judgments in the table are editorial guidance.
When a separate bamboo hoop suits the display
A working hoop does not have to become the finished frame. If you want a visible bamboo rim around the stitching, consider that appearance separately from the tool used during the project. DMC's Bamboo Hoop range uses bamboo rings, metal fittings and a knurled tightening screw; the manufacturer lists hoop art among its uses. Choose a display hoop by laying its opening over the finished composition, leaving the amount of surrounding fabric that looks intentional. A small motif may look balanced with a narrow border, while an airy botanical design may benefit from more open fabric. Neither arrangement needs to follow the size of the working hoop. For a piece you want protected behind glazing, consider a conventional frame instead. A hoop presents the textile openly. Decide where the finished work will live before trimming the fabric or choosing a permanent finishing method.
Check the whole design, not only its center
Trace the intended outline onto scrap paper and place a circle of the proposed hoop size over it. Include lettering, leaves and any stitched border. This simple layout check can reveal a cramped edge before you transfer the design to fabric. Leave enough fabric outside the working hoop to position and adjust it. Keep additional allowance if the piece will move into a different frame. Trimming to the hoop edge too early limits the finishing options later.
Let the fabric and stitch style guide tension
Aim for a supported surface without pulling the weave visibly out of shape. Smooth and adjust the fabric gradually, then check the alignment of the design. Follow instructions supplied with the hoop and pattern, particularly when using unusual fabrics or dimensional stitching. If the fabric keeps slipping, pause to inspect the setup rather than pulling the stitches tighter to compensate. Check that the rings are seated correctly and that the project suits the support method. Needlework frames and stands are alternatives when holding a hoop no longer matches the scale or technique of the project.
Plan the back as part of the display
Before finishing, decide how the extra fabric will be secured and whether you want a removable backing. Keep knots, thread ends and bulky additions away from the intended hanging point. Check the orientation of the design with the hoop upright before settling on the final placement.
Care and project storage
Keep hoops dry and store small hardware with its matching rings. Inspect surfaces for roughness or damage before placing delicate fabric inside. Follow the fabric and thread care instructions when cleaning finished embroidery; a cleaning method suitable for the cloth may be unsuitable for the surrounding frame. Between sessions, store the project where the fabric will not be crushed under other supplies. Avoid folding directly through raised stitching. Keep the pattern and remaining thread together so the next session can begin with the correct materials.
Choose the hoop around the project
Choose Clover's small hoop for compact working sections and its large hoop when a broader motif needs room. For the finished display, assess the rim, visible fabric border and location separately. That approach lets the working tool serve the stitching while the final frame serves the artwork.